Photography How To
Latest News
|Photography How To
Latest News

Subscribe

Check out a fun Doggy Photoshoot! Video instructions on tips for being creative with your images!

|
Photography How To

Photography How To

Archives

Check out a fun Doggy Photoshoot! Video instructions on tips for being creative with your images!

Check out a fun Doggy Photoshoot! Video instructions on tips for being creative with your images!
Marketing with a New Digital Lakes Region Area Guide!

Ed Mercer

Oct 13, 2025

Monday, October 13 , 2025

Photography Tribe is where 40+ years of Ed Mercer’s experience meet modern tutorials on gear, lighting, composition, exposure, and AI. Learn to edit like a pro and make your images pop!
👉 Join Photography Tribe today!

“Love learning new photography tricks?

Subscribe to our Photography How-to Newsletter and get fresh tips on shooting and editing delivered right to your inbox every week!”

CLICK HERE TO SUBSCRIBE!

7 Day Weather forecast for Naples, Maine

Click on the image to VIEW the pages!

Check out our NEW Digital Lakes Region Area Guide

A Very Fun Doggie Photoshoot!

Film vs Digital

Shooting with film and digital both have their own kind of magic! 🎞️ Film photography feels nostalgic and tactile — every click counts, and waiting to see your developed photos adds an element of surprise. The colors and grain often have a timeless, organic feel that digital can’t quite replicate. And yes — film is still very much alive! You can easily buy rolls online or at camera shops, and many labs (like The Darkroom, Richard Photo Lab, or even some Walgreens and CVS locations) still develop film. Some photographers even mail their rolls in and get digital scans back to edit on their computers.

Digital, on the other hand, gives you instant feedback and endless experimentation. You can shoot hundreds of photos without worrying about running out of film, adjust ISO, and fine-tune your images in seconds. It’s faster, more flexible, and perfect for learning or professional work where turnaround matters.

In the end, film teaches patience and intention, while digital unleashes creativity and speed. The best choice? Use both — film for the heart, digital for the hustle. 💥

 museum."

📸 Let me share a recent capture.

Trivia Question❓

What are 5 quick actions you can perform in Adobe Photoshop to instantly improve your photos?

Answer at the bottom of the newsletter

From Your Editor (Your Photography Buddy)

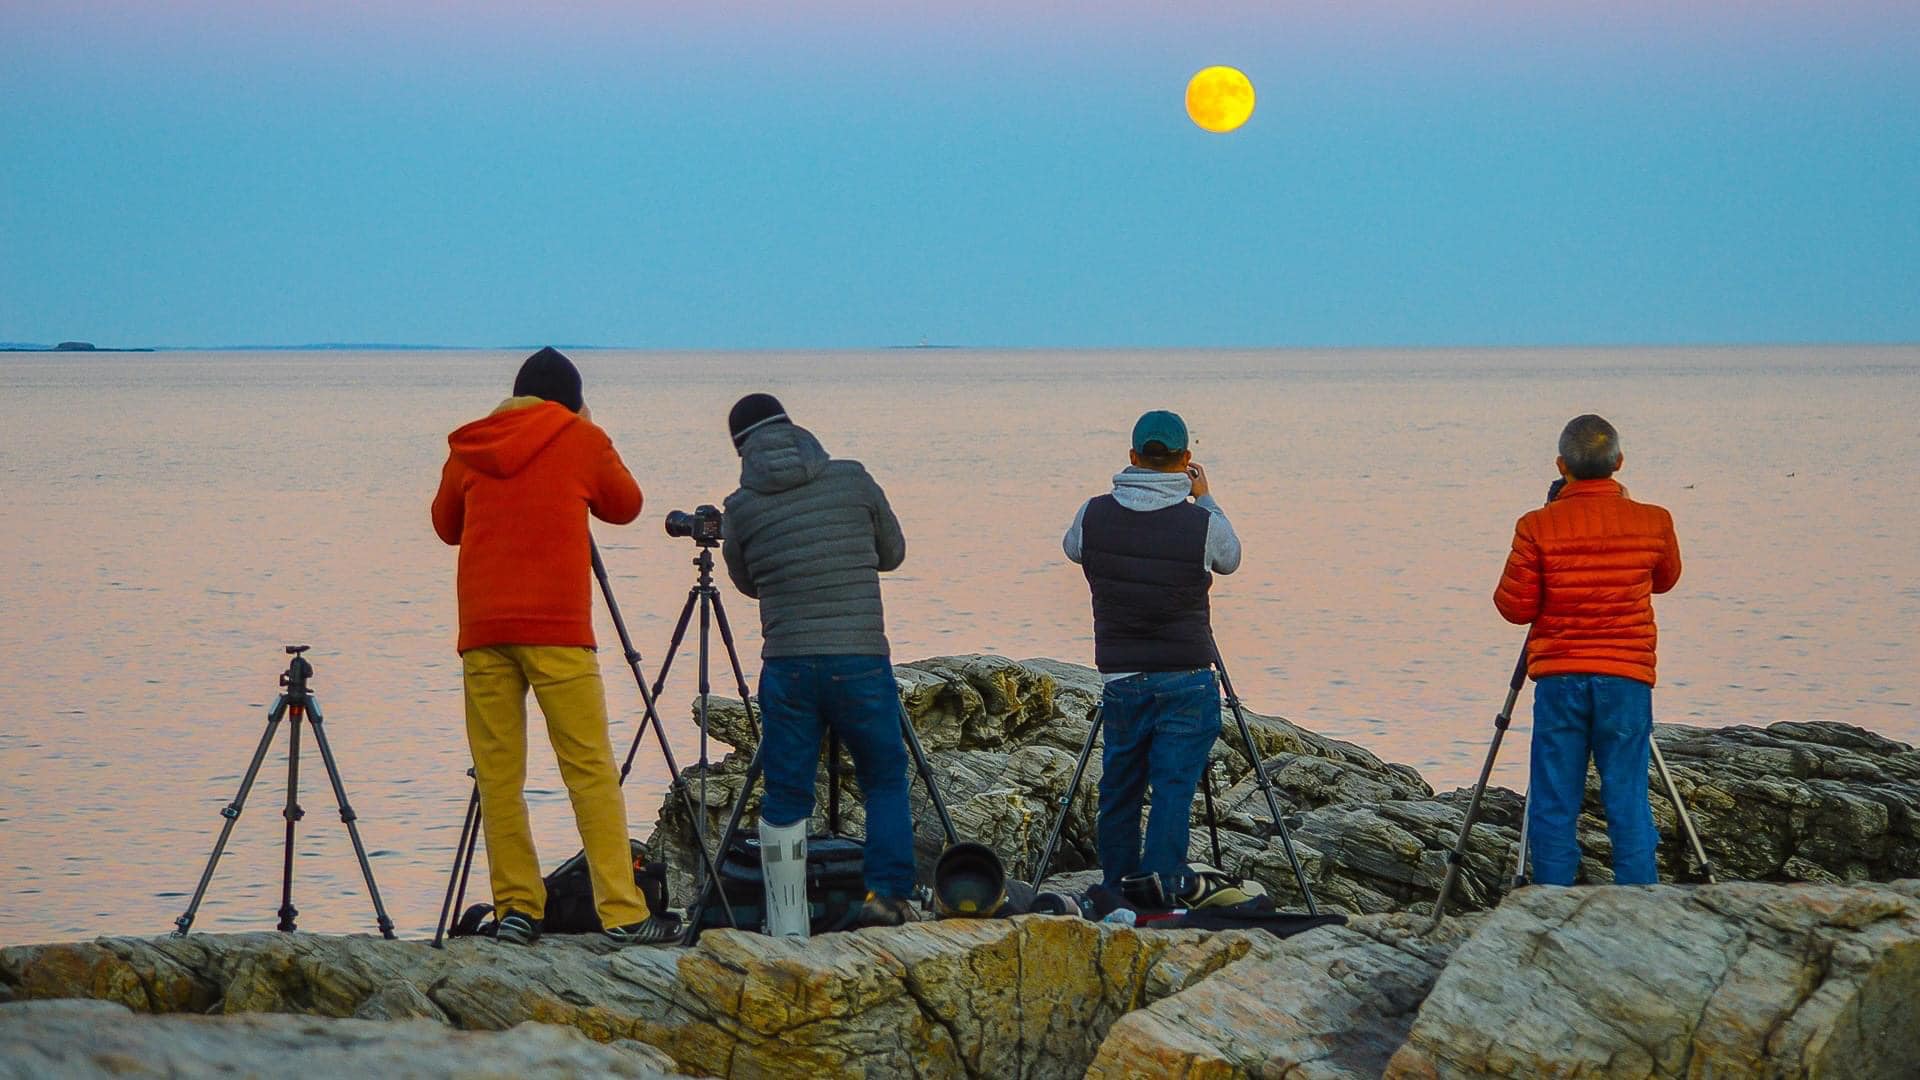
Many new photographers ask me "how can I get better candids?"  I alway give then this advice:  The best candids happen when you blend awareness with approachability! Keep your eyes open for great interactions — laughter, hugs, or animated conversations — and be ready for them before they happen. Stay pre-focused and anticipate the moment, so you’re not fumbling with settings when the magic unfolds. When you spot a lively group, don’t be shy — step in with a friendly, confident smile and say, “Hey, can I grab a photo of all of you together?” or “Look this way for a sec!” That little bit of direction turns spontaneous energy into genuine, natural expressions. Candid photography is all about being observant, ready, and fearless enough to step in when the story unfolds right in front of you.

📱 3 iPhone Tricks You Didn’t Know You Needed

Back Tap Magic
Your iPhone’s back can actually act like a secret button! By turning on Back Tap in settings, you can set it so that double or triple tapping the back of your phone does things like take a screenshot, open the camera, or even launch your favorite app. It feels like you’ve unlocked a hidden superpower.


Custom Vibration Alerts
Did you know you can “feel” who’s calling without even looking at your phone? Go into your contact settings and create a custom vibration pattern for specific people. That way, if your best friend calls, you’ll know just from the buzz pattern—even if your phone is in your pocket.


Sleep-Friendly Night Mode
Staring at your phone in the dark can be tough on your eyes. With Night Shift or True Tone, your iPhone automatically warms up the colors on your screen, making late-night scrolling much easier. You can even schedule it to turn on at sunset, so your screen matches the mood of the evening.

Create Your Own Photography Group!

Thinking of starting a photography group?  Come up with a fun name of the group: Photo Friends Meetup!  The best way to begin is with a fun, casual get-together! Invite local photographers of all levels to meet at a cozy café, scenic park, or community spot for coffee, conversation, and creativity. Keep it relaxed — have everyone share their favorite shot, a quick tip, or what they’d love to learn next. You’ll find that once the ideas start flowing, the group naturally turns into an inspiring circle of learning and support. End by snapping a group photo and setting the date for your next meetup. Before you know it, you’ll have a thriving photography community — growing, laughing, and learning together!

Q&A Questions

Q:  How can I remove spots or blemishes in my photos?

A:  You can use the Spot Healing Brush Tool in Photoshop or the Healing Tool in Lightroom. Just zoom in on the area with the spot, click or lightly brush over it, and the tool will automatically blend it with the surrounding area. Perfect for dust spots on skies or small distractions on skin and clothing! ✨


Q:  What’s the best way to remove people from my travel photos?

A:  If you're editing in Photoshop, use the Content-Aware Fill tool. Select the person you want to remove, hit Shift + Delete (or use the menu), and choose "Content-Aware." Photoshop will do its best to fill in the background naturally. You can also take multiple shots and blend them together using layers and masks for a cleaner look. 🏞️🧳


Q:  How can I change the color of the text I’m adding to my image?

A:  If you're adding text in Photoshop, just highlight the text with the Text Tool (T), then click the color box in the top toolbar. A color picker will pop up—choose any color you like! In Canva or Lightroom mobile, tap on the text and then tap the color icon to update the font color. 🎨💬

💡 Answer to Trivia Question:
  1. Crop & Straighten (C) – Tighten your composition and fix that horizon in seconds.

  2. Auto Adjustments (Shift + Ctrl/Cmd + L, M, B) – Quick fixes for tone, contrast, and color balance.

  3. Duplicate Layer (Ctrl/Cmd + J) – Always edit on a copy — safety first!

  4. Spot Healing Brush (J) – Zap dust, blemishes, or distractions in one click.

  5. Save for Web (Ctrl/Cmd + Alt + Shift + S) – Optimize your masterpiece for online sharing.

💡 Bonus Tip:
Hold the spacebar to pan around your image like a pro — smooth, fast, and efficient!

Monday, October 13, 2025

Photography How To

© 2025 Photography How To.

Photography How To is your ultimate resource for mastering photography, whether you’re a beginner or an experienced professional. We provide step-by-step guides, expert tips, and tutorials to help you improve your skills, understand your gear, and get creative with every shot. From mastering camera settings to advanced techniques, we cover everything you need to know to capture stunning images and develop your unique style. Let’s make your photography journey easier and more enjoyable!

© 2025 Photography How To.